こんにちは!
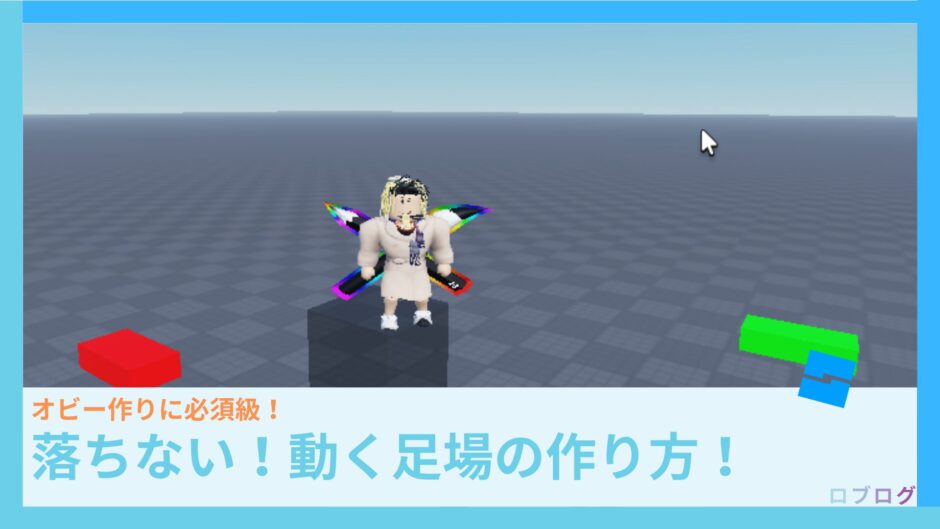
今回は、乗っても落ちない!!動くPartの作り方を教えます。
初めに準備
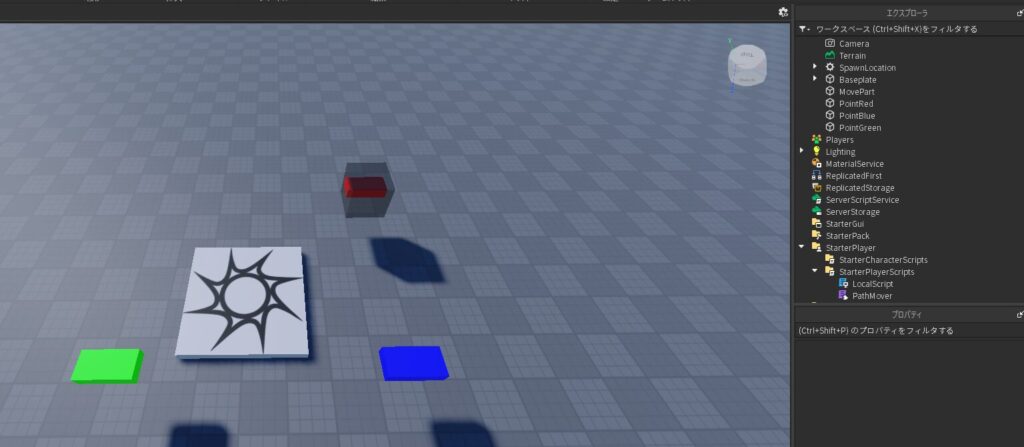
まずはWorkspace上に、うごく足場のPartと、中継地点(以降ポイントと呼びます)となる位置を指定するPartを配置します。
ポイントとは、駅のようなものです。ポイントからポイントへ、動く足場が向かっていきます。
今回の方法では、2つの足場の移動パターンが作れます。
①「ポイント1->ポイント2->ポイント3->ポイント1->ポイント2…」のように、元のポイントに戻ってループするパターン
②「ポイント1->ポイント2->ポイント3->ポイント2->ポイント1->ポイント2…」のように、往復してループするパターン
よく分からなくてもやってみれば意味が分かるはずです。
まずは、Workspace配下に「MovePart」「PointRed」「PointBlue」「PointGreen」をこのように作成します。
特に3つのPointは三角形上に配置すると分かりやすいと思います。色も変えましょう!
また、MovePartは半透明にしておくと分かりやすいと思います。
まずは「落ちる!動くPart(足場)」をつくる
次に、StarterPlayerScripts配下にModuleScriptを配置します。名前は「PathMover」
そして、以下のスクリプトを貼り付けます。
-- クライアント向け:指定された CFrame と時間のリストでパートを順番にループ移動または往復移動させるモジュール

local TweenService = game:GetService("TweenService")

-- カスタム型定義
export type Waypoint = {
	cf: CFrame,
	time: number,
}

export type LoopMode = "Loop" | "PingPong"

local PathMover = {}
PathMover.__index = PathMover

-- コンストラクタ
function PathMover.new(
	part: BasePart,
	waypoints: { Waypoint },
	loopMode: LoopMode,
	defaultEasing: Enum.EasingStyle?
)
	assert(part and part:IsA("BasePart"), "part は BasePart である必要があります。")
	assert(type(waypoints) == "table" and #waypoints > 0, "waypoints は少なくとも1つの要素を持つテーブルです。")
	assert(loopMode == "Loop" or loopMode == "PingPong", "loopMode は 'Loop' または 'PingPong' である必要があります。")

	local self = setmetatable({}, PathMover)
	self.Part = part
	self.Waypoints = waypoints
	self.LoopMode = loopMode
	self.DefaultEasing = defaultEasing or Enum.EasingStyle.Linear
	self._running = false
	return self
end

-- 移動を開始
function PathMover:Start()
	if self._running then return end
	self._running = true

	task.spawn(function()
		local index = 1
		local dir = 1 -- PingPong時の進行方向
		while self._running do
			local wp = self.Waypoints[index]
			local info = TweenInfo.new(
				wp.time,
				self.DefaultEasing,
				Enum.EasingDirection.Out,
				0,
				false
			)
			local tween = TweenService:Create(self.Part, info, { CFrame = wp.cf })
			tween:Play()
			tween.Completed:Wait()

			if self.LoopMode == "Loop" then
				index = index + 1
				if index > #self.Waypoints then
					index = 1
				end
			else -- PingPong
				index = index + dir
				if index > #self.Waypoints then
					index = #self.Waypoints - 1
					dir = -1
				elseif index < 1 then
					index = 2
					dir = 1
				end
			end
		end
	end)
end

-- 移動を停止
function PathMover:Stop()
	self._running = false
end

return PathMover
上記は、オブジェクト指向を取り入れた、動くPartが作れるモジュールスクリプトです。
意味が分かる場合は後で改造してみるのも面白いかもしれません。
次に、StarterPlayerScripts配下にLocalScriptを配置します。このようにしてください。
local pathMover = require(script.Parent.PathMover)
local part      = workspace:WaitForChild("MovePart")

local wayPoints = {
	{ cf = workspace:WaitForChild("PointRed").CFrame, time = 2 },
	{ cf = workspace:WaitForChild("PointBlue").CFrame, time = 2 },
	{ cf = workspace:WaitForChild("PointGreen").CFrame, time = 2 }
}

local movePart = pathMover.new(part, wayPoints, "PingPong")
movePart:Start()
先ほどのモジュールスクリプトの中身は理解していなくてもいいですが、こっちはなんとなくでいいので、理解しておく必要があります。
①まずは1行目でモジュールスクリプトを読み込みます。
②wayPointsテーブルでは、各ポイントの情報を定義しています。
③wayPointsテーブル配下にさらにポイントごとにテーブルを作成します。
④各ポイントごとのテーブルでは、CfでCframe、timeで移動時間を指定します。
⑤movePartオブジェクトを作成・定義します。第一引数では対象の動かすPart、第二引数では先ほどのポイントテーブル、第三引数では移動パターンを指定します。Loopで先ほどの①、PingPongで先ほどの②の移動パターンになります。第四引数で任意でEnum.EasingStyleを指定することもできます。
PingPoingの方がObby系ゲームではよく使われていますし、ポイントの配置の自由度も上がるので、おススメです。
⑥最後に、作成したオブジェクトを起動させます。ちなみに、movePart:Stopで停止させることもできます。
ここまでできたら、実行してみましょう!
しっかり動きましたね!
Loopにするとこんな感じの挙動になります。
これで完成!かと思いきや….
「落ちない」ってなに?
これまでに作った動くPartは「落ちます。」
試しにPartに乗ってみましょう。
そう、キャラがPartの動きに追従してくれず、落ちてしまうんです!
他のオビーゲームでは当たり前のように実装されている仕組みですが、実はRobloxの標準機能ではありません。
落ちない!動くPartを作るには
移動する土台の上に乗っているプレイヤーの位置を、土台に合わせて滑らかに更新し続ける処理を追加すればいいです。
新しくLocalScriptを作成して、以下のコードをコピペします。
-- プレイヤーが特定の移動パート(プラットフォームなど)の上にいるとき、その動きに追従する仕組み

local Players = game:GetService("Players")
local RunService = game:GetService("RunService")

local player = Players.LocalPlayer

local PLATFORM_PART_NAME = "MovePart"

local updateConnection: RBXScriptConnection? = nil
local deathConnection: RBXScriptConnection? = nil
local lastPlatformCFrame: CFrame? = nil

local function disconnectConnections()
	if updateConnection then
		updateConnection:Disconnect()
		updateConnection = nil
	end
	if deathConnection then
		deathConnection:Disconnect()
		deathConnection = nil
	end
end

local function setupCharacter(character: Model)
	local rootPart = character:WaitForChild("LowerTorso")
	local humanoid = character:WaitForChild("Humanoid")
	lastPlatformCFrame = nil

	updateConnection = RunService.Heartbeat:Connect(function()
		local ray = Ray.new(rootPart.CFrame.p, Vector3.new(0, -50, 0))
		local hitPart = workspace:FindPartOnRay(ray, character)

		if hitPart and hitPart.Name == PLATFORM_PART_NAME then
			local platform = hitPart
			if lastPlatformCFrame == nil then
				lastPlatformCFrame = platform.CFrame
			end

			local currentCFrame = platform.CFrame
			local deltaCFrame = currentCFrame * lastPlatformCFrame:Inverse()
			lastPlatformCFrame = currentCFrame

			rootPart.CFrame = deltaCFrame * rootPart.CFrame
		else
			lastPlatformCFrame = nil
		end
	end)

	deathConnection = humanoid.Died:Connect(function()
		disconnectConnections()
	end)
end

-- 最初のキャラクターに対しても設定
if player.Character then
	setupCharacter(player.Character)
end

-- 死亡後に復活したときにも再接続
player.CharacterAdded:Connect(function(newCharacter)
	disconnectConnections()
	setupCharacter(newCharacter)
end)

-- 参考: https://devforum.roblox.com/t/jailbreak-train-platform-system/236339/34
これで、MovePartという名前のPartがプレイヤーの下にあれば、そのPartに追従するようになりました。
試しにもう一度プレイしてみましょう!
動きましたね!おめでとうございます🎉
これで「落ちない!動くPart(足場)」が完成しました。
おつかれさまでした!
最後に
今回の記事では、落ちない動くPart(足場)を作成しました。スクリプトを改造して使ってみるのもありです。
90分クオリティでしたが、誰かのオビーゲーム制作などの参考になったらうれしいです。
最後までご覧いただきありがとうございました!